Hey Guys, how are you guys today we are going to do Battleground Mobile India photo editing with pics art, this editing is going to be very interesting and all the background and png I am going to use in this you will get the link below. You can easily download and edit, what is the use of three applications, first picsat, second lightroom and third autodesk, so I am going to tell you in full detail about all, so please read further.picsart BGMI photo editing,Picsart BGMI photo Editing.
BGMI PHOTO EDITING:-
First of all you have to download all the material through our website and after that you have to open the background inside your pics art and before that you have to cut out your photo, cut out if you don’t know how to do then you can download youtube You can cut out your photo very easily by searching by going to it, after that you have to import your photo, after doing all this you have to add the background inside the pics art application and there you have just added your photo. The photo was cut out, it has to be added after it was added, you have to note that the photo should be cut out well so that your photo looks very good so that your photo will look completely original, after that you have to Inside Pix Art, you have to go to the draw tools and add some shadows so that your photo will get a very good real tune.
How to Add Png In Picsart:-
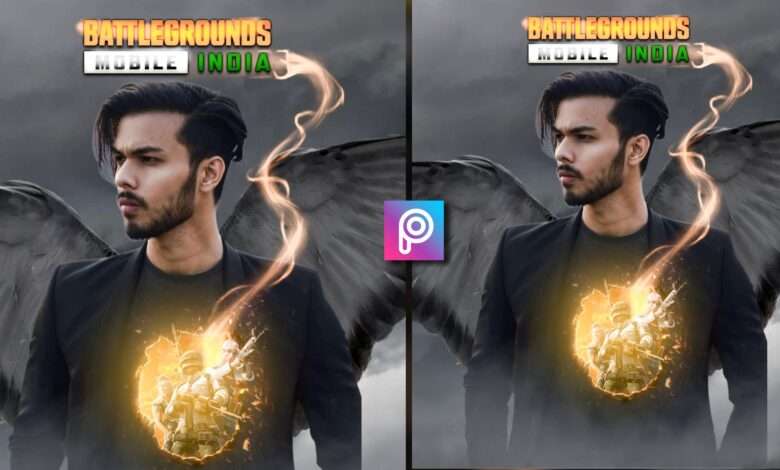
After doing all this, you have to add the PNG which I gave you here in turn, first you have to add the people’s PNG and also add a light PNG there, which will give a very good effect. It will look very good and after that you have to add another PNG which is going to the text key then in the last you will also get to see the PNG containing the text and you have to add that too at the top And you can see in the thumbnail how I have added, in the same way you can also add to your photo, after all this, you do not have to do anything, save your photo.
Face Smooth in Autodesk:-
After all this, you have to open your photo in Autodesk application, here you can smooth the face of your photo well, you have to go from Simple to Bruce tool and there you have to select the smooch year and you can make your fans happy. You can do this very well and with the help of this brush you can also edit your hair, that too very easily.
Color Grading In Lightroom:-
In the end, after all this, you have to import your photo inside the light room, where you will do the most important work in your photo, here you have to color grading your photo well so that your photo looks absolutely real If the end matches with the background, then for that you have to first go to the option of light and then increase it and reduce the black so that our photo will look very good, after that if you are not able to adjust the lighting properly. So you can also use Photo Told so that the automatic light will be adjusted in your photo and after that you have to go to the color option and go to the mix tools and there you have to do a little color coding and you have to set the temperature. Minus has to be kept around 10 and after that you have to add some effects to your photo such as sharpening, masking and noise reduction and you have to do a little bit of vignette too so that your photo has enough Good look will come and your photo will look absolutely realistic if guys If you want to see its full tutorial video, then you can search our YouTube channel (Saha Social) where I have made a video on it in full details so that you can edit your photo very well by watching it. Also Check