Blue And Orange Lightroom Mobile Presets – Saha Social
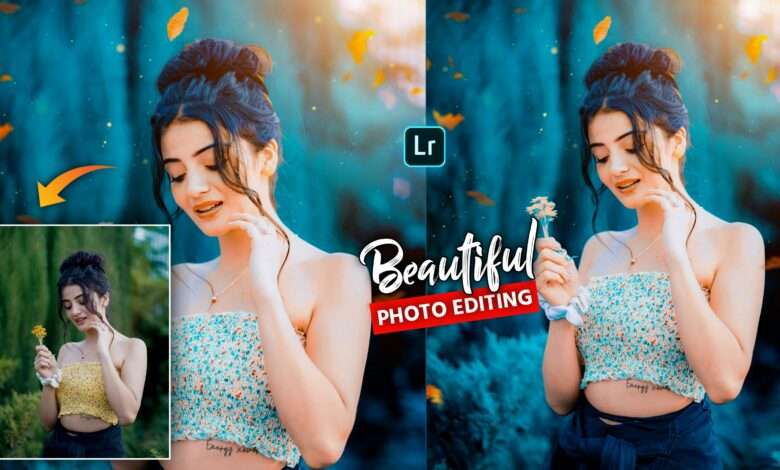
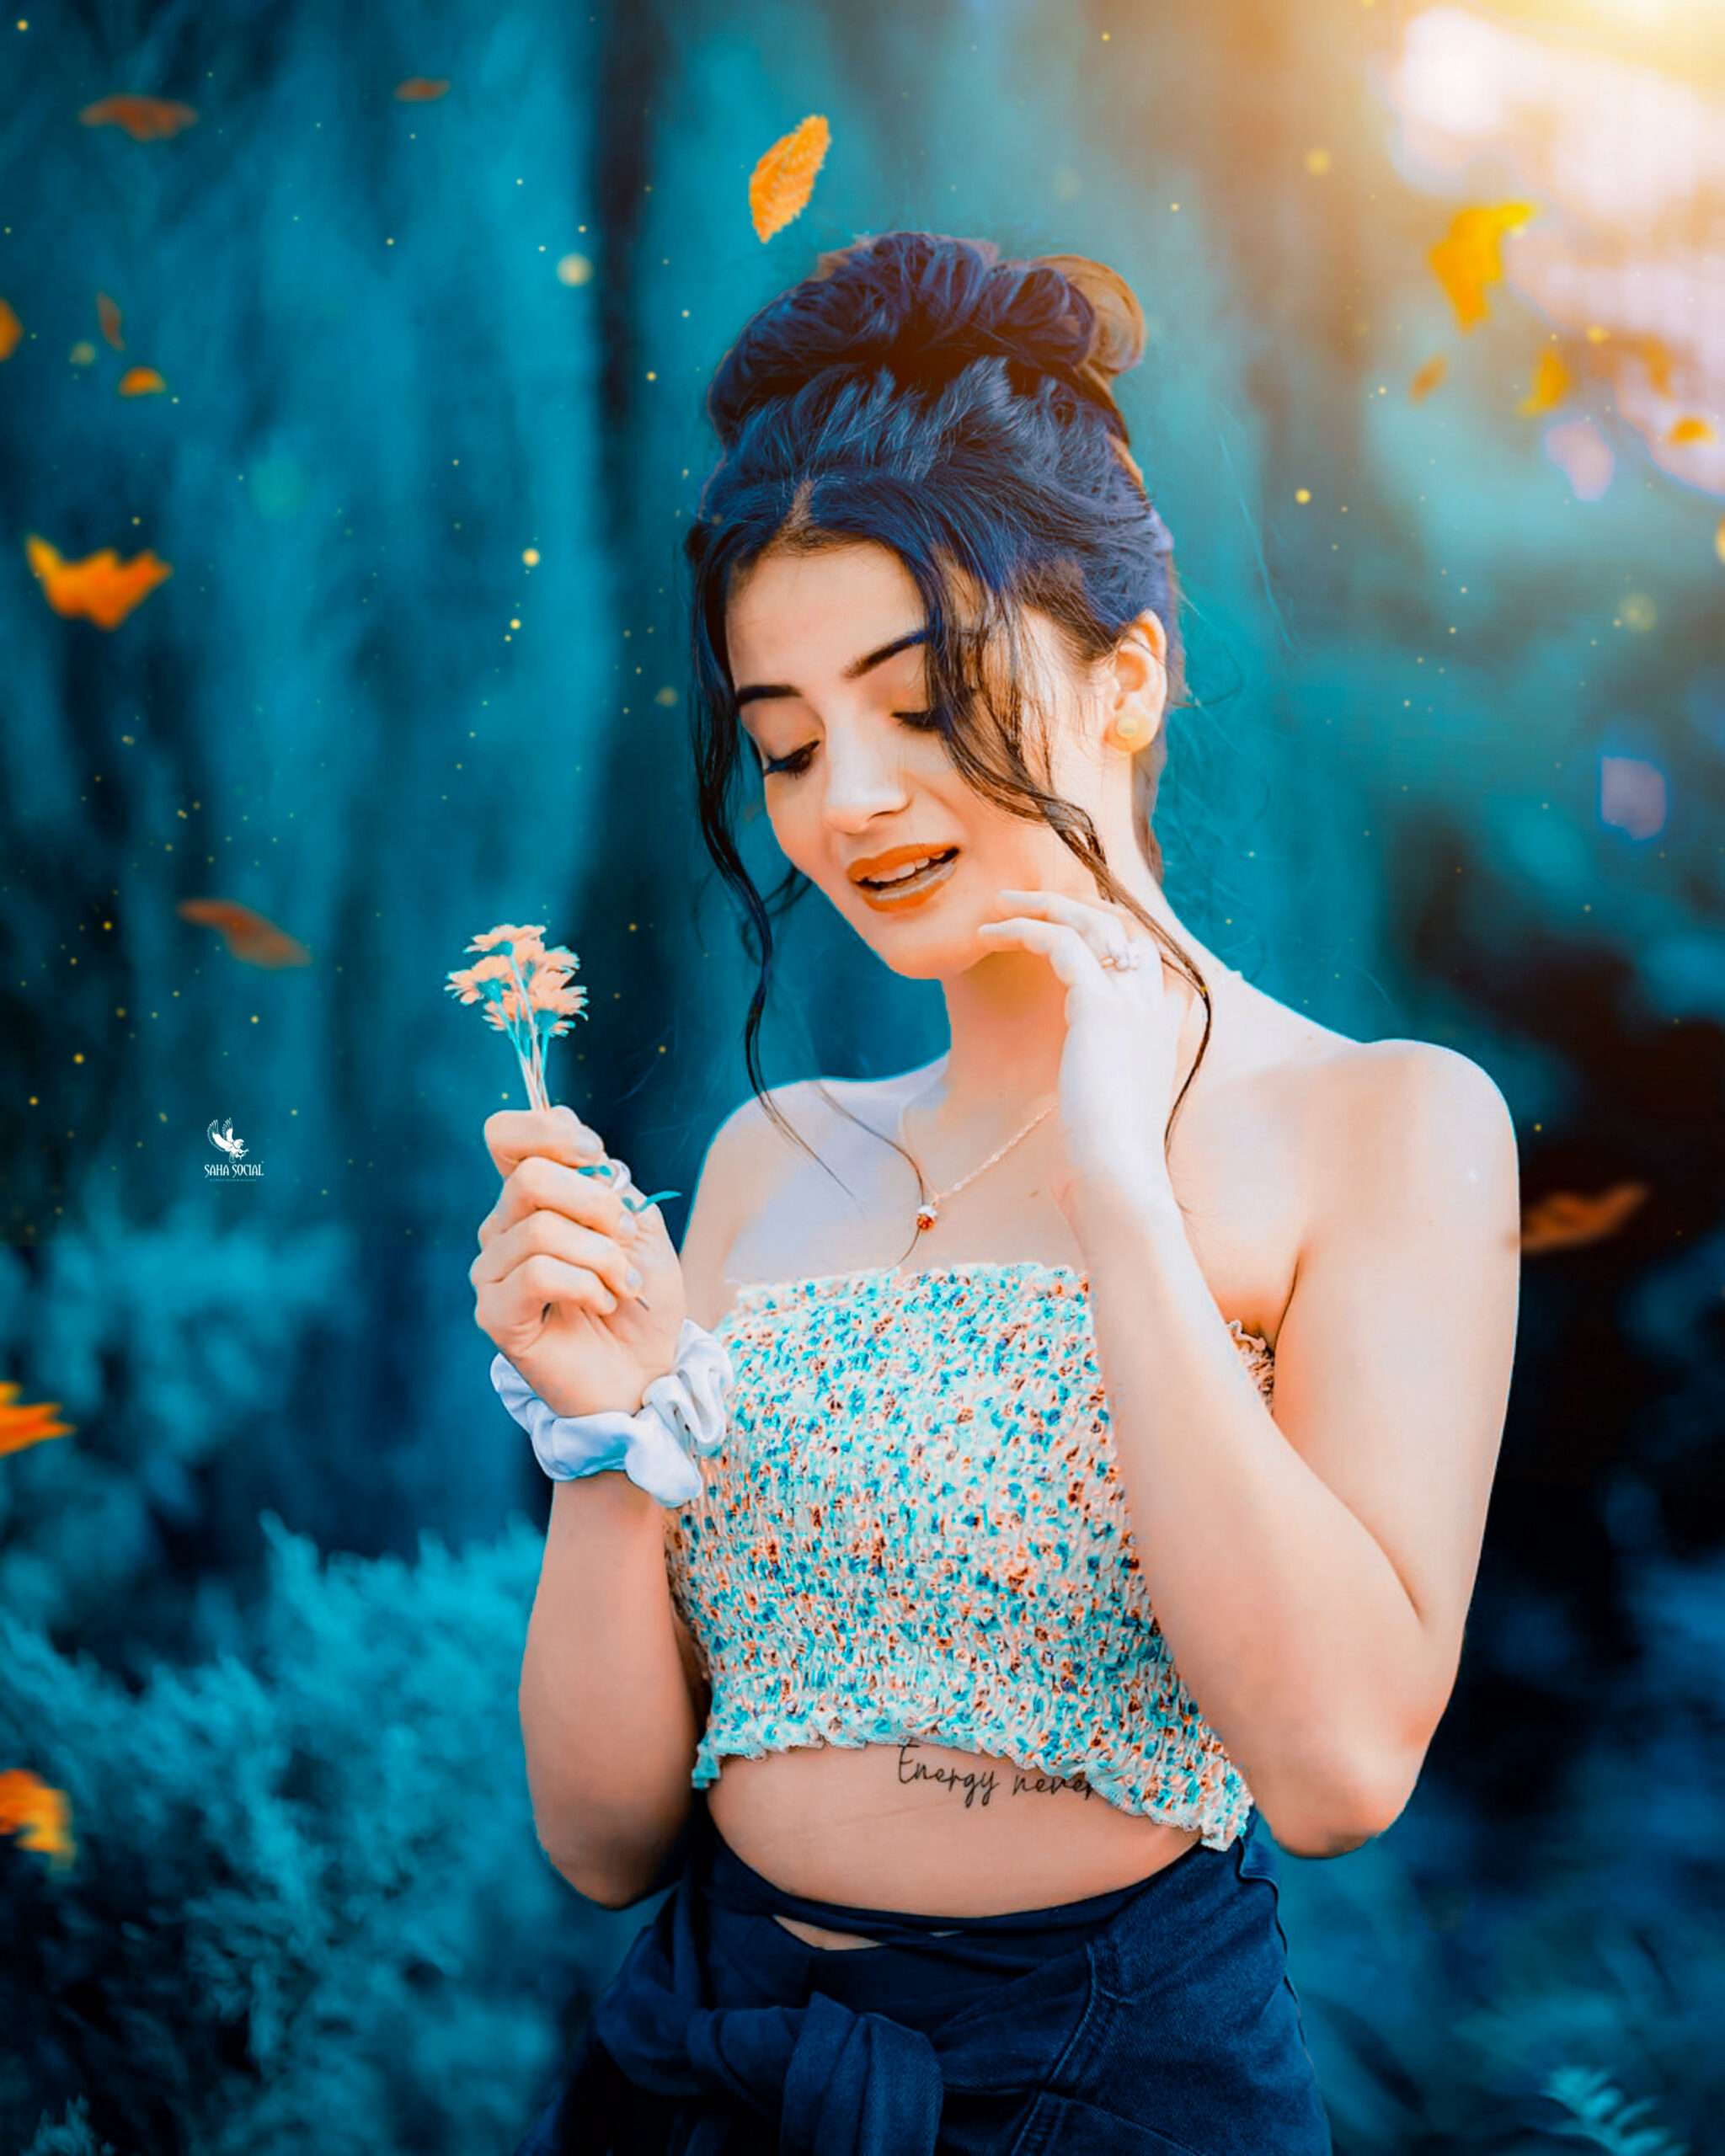
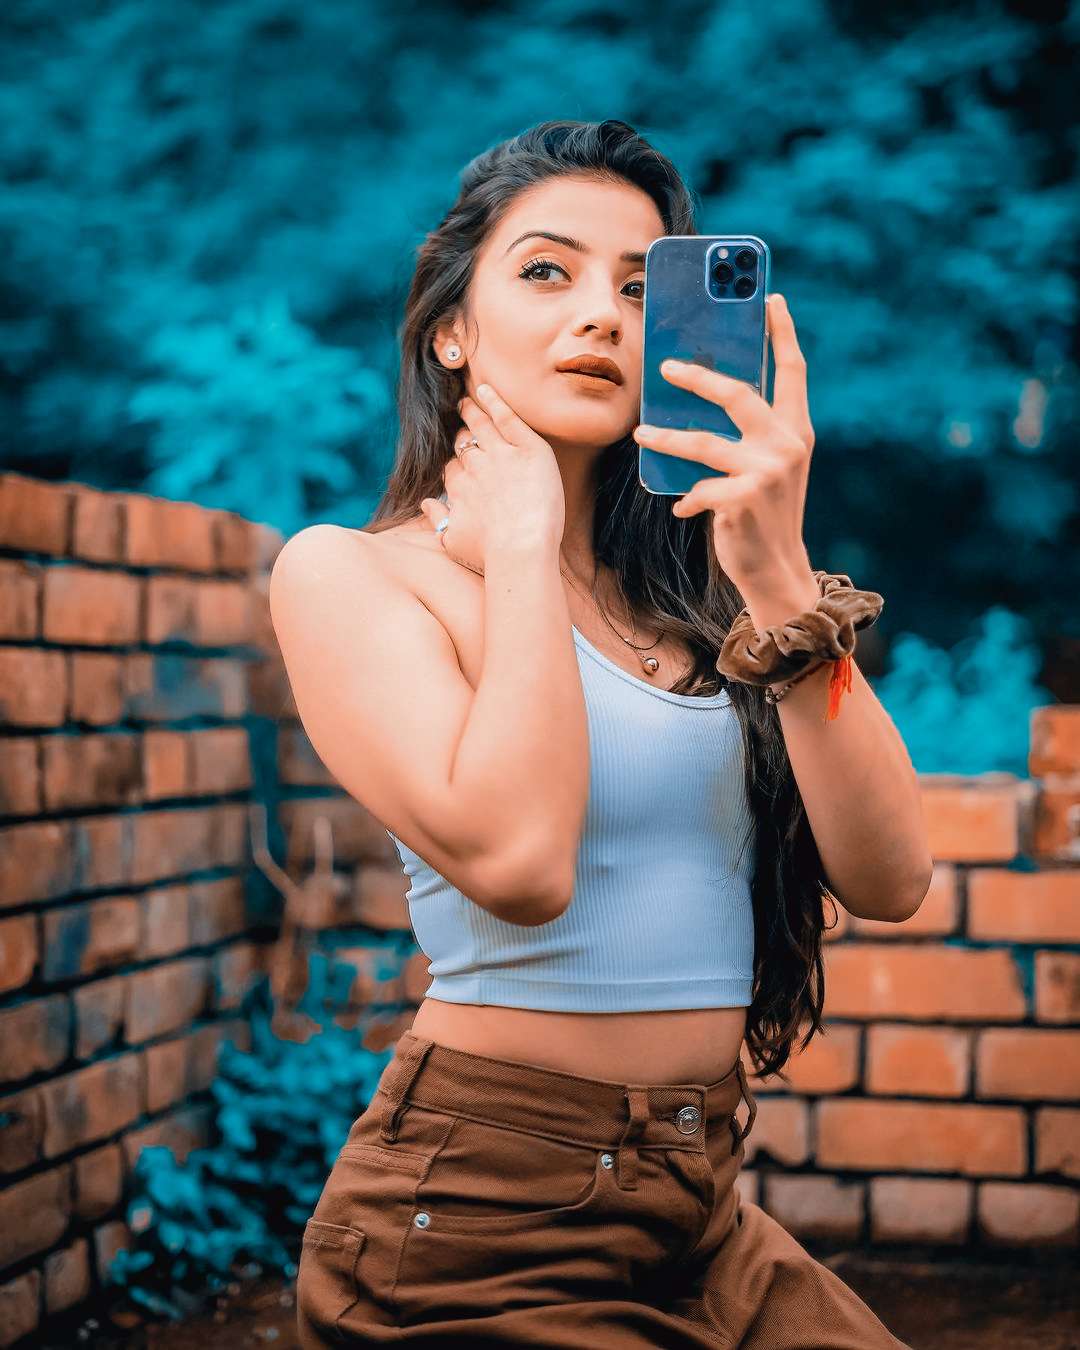
Blue And orange:- Hello guys so how are you guys today i am going to tell you in this blog how you can do blue and red type photo editing with lightroom and pics art help and it is a very good editing and you can do it manual editing too If yes, then you can do this kind of photo editing by using direct presets also friend, if you retouching your photo then it is very best for you because you will not even need to work hard and a new one in your photo. Everyone will come, so let’s start without delaying. Blue and Orange Tone Photo Editing.
Blue And Orange Tone Lightroom Mobile Presets ➤
So what to do first of all, you have to download PicsArt and Lightroom in your phone and let me tell you another method to do this kind of editing, what you have to do is that you have to cut out your photo in any application. And I will give you the background of red and black type and you can edit your photo with red and blue type of photo by directly adding it to your photo inside pics art and you don’t need to do that much. You can do this kind of editing directly, otherwise you can do it in any application, if not in picsart, it is your choice.
How To edit Blue and orange Tone➤
First of all let me tell you how to do red and blue type of photo editing in PicsArt, then first of all you have to import your photo inside Pix Art and there you have to go to FX Tools and Color Tools. And there you will see the tool of color replace, you have to click on it and by selecting the background color, you have to make it blue there and now the background in your photo will be blue and your whole background will be blue So that blue will come in your photo and if blue tone is coming on your face then you go to the option of danger and erase the blue tone from your face so that it looks good on your face or even on your hair. If it is coming then you can also remove it by going to the eraser.
after that what you have to do is that I will give you a PNG of cards which you have to download absolutely free and after that you have to add it to your photo. And by going to the adjust option, make its color red and add a PNG of red leaves to your photo. And your photo will have absolutely red and blue effect and now your photo will look very nice red and blue type and after that if you want to edit your photo face smooth or hair then you can do all this work in autodesk application.
Download Blue And Orange Lightroom Presets ➤
Now let me tell you how you can do this kind of editing inside Lightroom, first of all you have to download the Blue And Orange presets, you will find the link below, you can go and download the presets directly, after that you will get this Presets for Lightroom You have to import inside the application and you also have to do your photo on which you want to bring orange and blue tone.after that you have to apply this presets on your photo and save your photo which you have now You have to delete the photo you had saved from the Lightroom application.
after that you have to import the photo that you just saved in the Lightroom and go to the color tools and go to the Mix tool there and you have to You have to adjust the color and convert it to blue tune and after that you can make some adjustments according to you like lighting or color or by adding effects according to your photo.
More ➤
you can make your photo very good here and then After that you have to save your photo and what to do in the last that you have to do pics art or picture. With the help of Snapseed, you have to add a PNG of a card here, which you can adjust and make it red and your photo will be very easily blue And Orange type photo editing and your photo copy will look good. If any of your friends also want to do this type of editing, then you can share our article with him so that he also learns to do this type of photo editing and you will get to see many types of photo editing articles on our website. By reading you can learn very good editing.
How To Use Lightroom Mobile App ➤
So friends, if you do not know about the Lightroom app or you do not know how to use the Lightroom app, then I tell you how to use it, then first of all you will get it easily available on the play store, from there you You can download, after downloading, you need to understand all the tools there and as far as I talk about this app, it is a very good editing software or an application so that you can color grading your photos very well. You can also do that in a professional way like you do in Photoshop, if you want to see a video about it, then you can visit our YouTube channel Saha Social, on this I make videos and in this you will find very good types of videos. You can also use presets.
Use Of Xmp Lightroom Presets➤
If you do not know about Blue And Orange Lightroom Mobile Xmp Presets, then let me tell you what kind of presets it is and how to use it like I am going to give you the top five xmp presets in this blog. All the new presets you will get will be in the form of xmp file which you can use by adding inside your light room very easily, you do not need to copy paste again and again, so you can use any photo I will be able to apply it very easily and will be able to edit your photo immediately, it is very beneficial for you.
•First of all you have to download ZR Zip File Manager from playstore.
•You have to download the zip file of our provided XMP presets
•After that you have to extract this zip file by going inside ZR archiver.
•If you ask for password there then you have to give 0888
• zip file is extracted, you have to open
•After that move the file which will be visible there and go to Android>Data>Adobe lr>File>crasualdocuments>oooooo>Profile>setting>user style.
•After reaching here, you have to paste it.
System requirements ➤
•2GB Ram In Your Phone
•4GB internal Memory In Your Phone
•Minimum Android KitKat Version
How To use Lightroom presets➤
If you do not know what is Lightroom Mobile Preset, then let me tell you this is a type of file in which we can copy the setting of editing, whatever you do editing inside your mobile lightroom, we can do that editing. Convert it as a DNG file and save it, which we call presets, it is of two types, first dng second XMP, we use these two differently, which is our dng presets, we copy We use it by pasting and we use it by saving our xmp presets inside lightroom I hope now you have got to know what is lightroom mobile presets.

